Have you ever found yourself lost among countless Jira issues and tasks at work? If that is the case, you should prepare more carefully and learn how to manage priority in Jira more efficiently.
The ability to effectively prioritize your Jira tasks is crucial for steering project timelines and ensuring that the most critical issues are addressed promptly. In this article, we’ll explore key strategies and best practices to help you and your team effectively manage priorities in Jira.
Whether you’re just getting started with Jira or looking to refine your skills, this guide will equip you with the knowledge to optimize your project outcomes and succeed.
What is a priority in Jira?
In Jira, “priority” is a field used to specify the importance of an issue to other issues in your project. It helps to determine how urgently a task needs to be addressed, guiding teams on where to focus their efforts first.
Besides, priorities are generally visible and editable in the issues themselves. As a result, team members can assess and adjust them quickly to keep up with the fast-paced environment.
Jira comes with a default set of priority levels, which typically are:
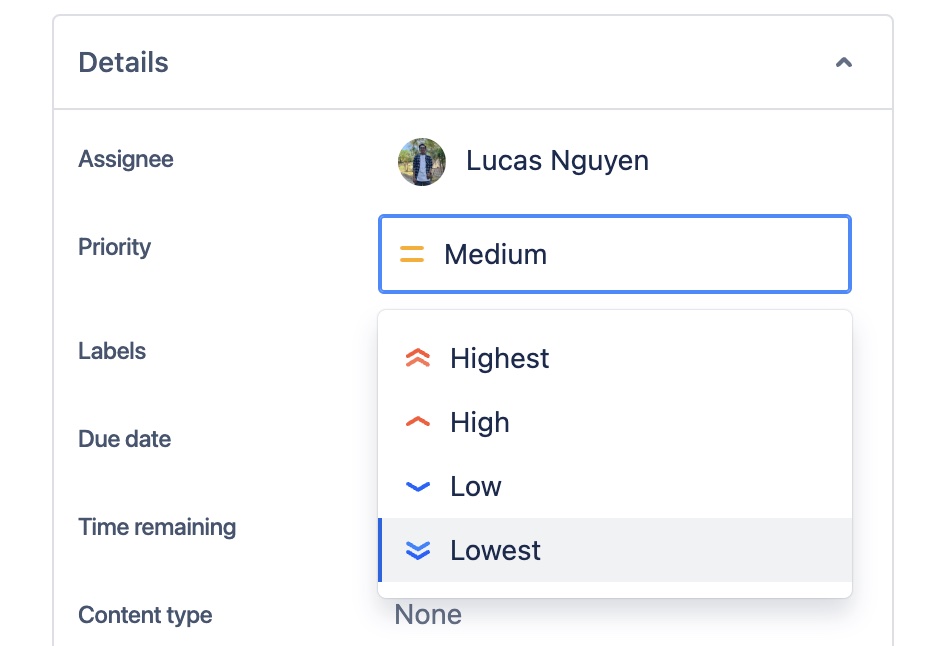
- Highest: This priority in Jira indicates that problems will block progress and require completion first.
- High: It means the problem is serious and could block progress.
- Medium: The issue has the potential to affect the progress of your project.
- Low: This priority relates to minor problems that you and your team can easily work around.
- Lowest: This indicates a trivial problem with little or no impact on your progress.
Additionally, you can always customize these priorities based on the specific needs and processes of a project or organization.
For more details about what it is and why it’s important, you can read our article for a better understanding of Jira’s priority.
How to manage priorities in Jira?
1. Locate the Jira priorities
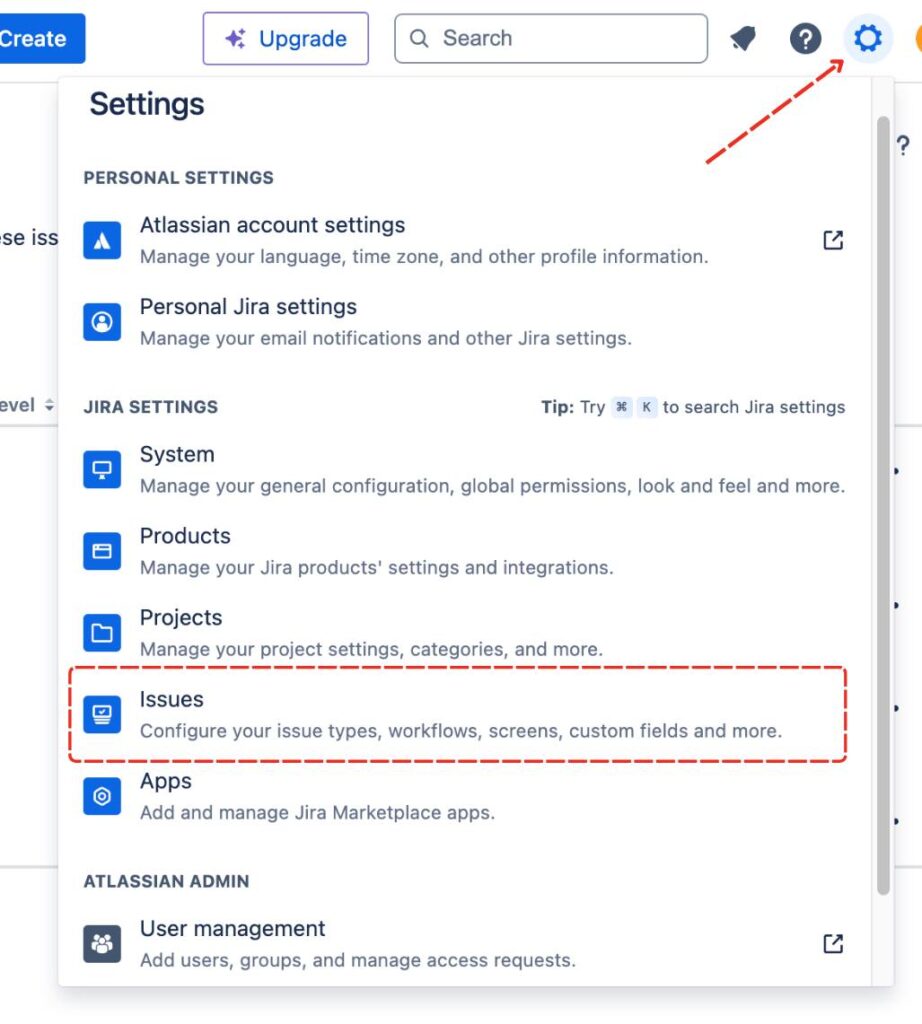
From your Jira software or Jira work management, you can click on the Cog icon next to your profile avatar. Then, you can choose the “Issues” section.
Now, you can scroll down on the left side menu, and you should be able to find the “Priorities” tab.
At this point, you can see all the information of priorities on the dashboard. They include the Name, Description, Icon, Color, Order, and Actions that you can do to these priorities.
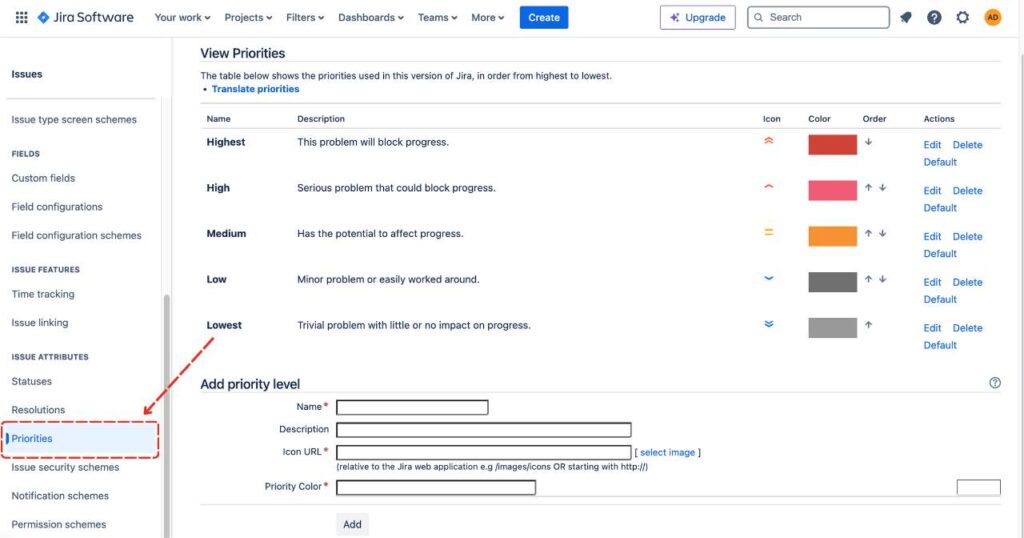
And you might have expected, you can freely customize the priority’s information to suit your needs or references. However, one thing to keep in mind is that you should give each priority a unique description (although you can leave it blank) to clarify its meaning.
2. Create a priority in Jira
If the default priorities cannot fulfill your project’s requirements, you can always create a new priority in Jira.
At the bottom of the Priorities board, you will a section to add a new priority level. So, all you have to do is fill in the name, description, and the priority color to make it different.

Not only that, you can also choose a unique icon to represent this priority level. Once done, you can simply click Add to complete the process.
3. Associate priorities with your projects
To choose a priority or a set of Jira priorities for your project, you will have to add them to a priority scheme. Then, you need to associate this scheme with a project.
Keep in mind that the project will use the default priority scheme for Jira IF you haven’t associated projects with your custom priority scheme.
4. Edit and delete a priority in Jira
If you want to make some adjustments to the default Jira priorities, you can do it easily. You can just go to the priority that you want to edit and then choose Edit.
And in case you want to remove priorities that you no longer use in your Jira instance, you can go to a specific priority and choose Delete
5. Arrange the order of your priorities
To have better productivity, you can rearrange the priority level orders and decide how they show up in the dropdown menu. This will make it easier for the user to create or edit an issue.
You can simply arrange their order by clicking on the up or down arrow to move that priority accordingly.
Tips and tricks to manage priority in Jira effectively
Sometimes, deciding the priority level of each task can be a hassle, especially when there are too many aspects or changes to consider. Therefore, we’ve compiled a list of tips and tricks to help you and your team utilize Jira’s priority settings to their fullest potential.
1. Define priority levels clearly
You must ensure that everyone on the team understands what each priority level means by holding a meeting or training session to discuss the implications of each priority level. That is also why giving unique descriptions for each priority (as we mentioned above) is important.
Additionally, you should create a reference document that clearly defines each priority level and the criteria for assigning them to issues. As a result, this can ensure consistency in how priorities are assigned.
2. Prioritize tasks with the customer in mind
At the end of the day, it is all about delivering a product that can truly satisfy your hard-earned customers. Therefore, you should consider the impact on the customer or end-user when setting priorities, giving higher priority to issues that significantly affect user experience.
Additionally, you can implement mechanisms to gather feedback from customers about bugs or requests that they consider important and prioritize your Jira tasks accordingly.
3. Integrate priority into your project workflows
You should also utilize Jira’s workflow capabilities to enforce rules based on priority. Something like requiring that all ‘Critical’ issues are reviewed by a project manager before being closed proves to be effective.
Moreover, you can set up notifications to alert team members when high-priority issues are created or updated. As a result, this will keep everyone informed and ensure a quick response to critical tasks.
4. Take advantage of Filter and Dashboard
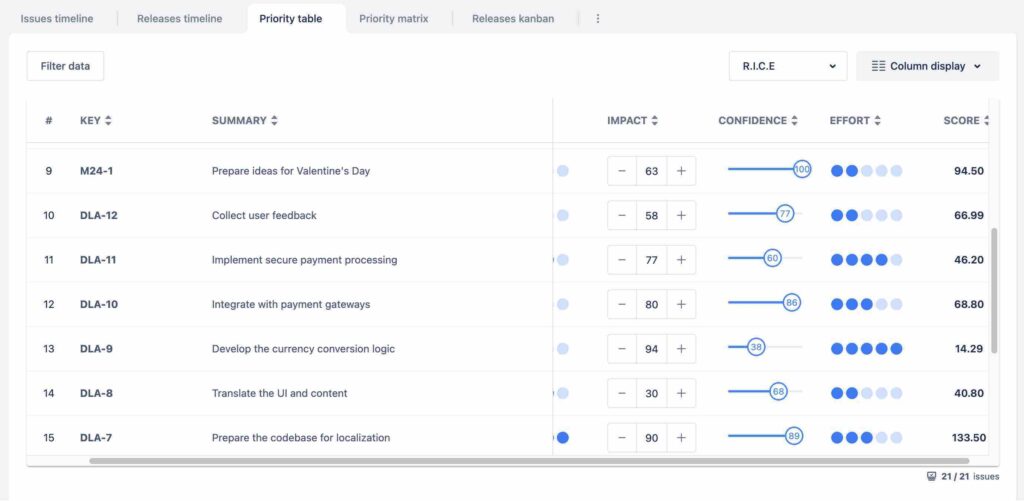
You can employ Jira Query Language (or JQL) to create filters that display issues based on their priority. For example, you can employ priority = “High” to sort out the Jira issues with only high priority.
As a result, it is much easier to focus on high-priority tasks during daily work. Besides, you can also utilize dashboards to display priority-based panels, helping team members see at a glance which issues need immediate attention.
5. Review and adjust priorities regularly
It is recommended to set regular intervals, such as weekly or bi-weekly, to review the priorities of ongoing issues. This helps team members adapt to changing project needs and reprioritize tasks as necessary.
Besides, you should also encourage team members to adjust priorities as they work on tasks and as project dynamics change, allowing for flexibility to address emerging issues more efficiently.
6. Train and empower your team
Last but not least, you should offer ongoing training sessions on how to effectively manage and assess priorities. This will help newer team members get up to speed and reinforce the process for existing members.
Moreover, you should also empower team members to make priority decisions on their own. When team members feel accountable for their tasks and their prioritization, they are more likely to engage proactively with their work.
Conclusion
It is essential to effectively manage priority in Jira for any project’s success. Moreover, it not only helps in aligning resources appropriately but also ensures that critical issues get the attention they deserve, swiftly.
By understanding and implementing the strategies outlined above, teams can enhance their productivity and project outcomes. We encourage you to implement these practices in your projects and experience the difference they make.
We hope you found these insights and strategies valuable for enhancing your team’s efficiency and productivity.
Related topics: