Prioritization is crucial to any project or product development, especially in an agile environment. One miss-step can affect the workflow of the whole team.
Therefore, it is recommended to use a project management tool, like Routemap, to prioritize your work and decide which task need to complete first. In this guide, we’ll show you how to make prioritization for Jira with Routemap.
A step-by-step guide to make prioritization for Jira using Routemap
1. Install the Routemap app
First and foremost, you will have to install Routemap, a powerful solution to create an advanced roadmap for Jira. And you can find this app on the Atlassian marketplace.
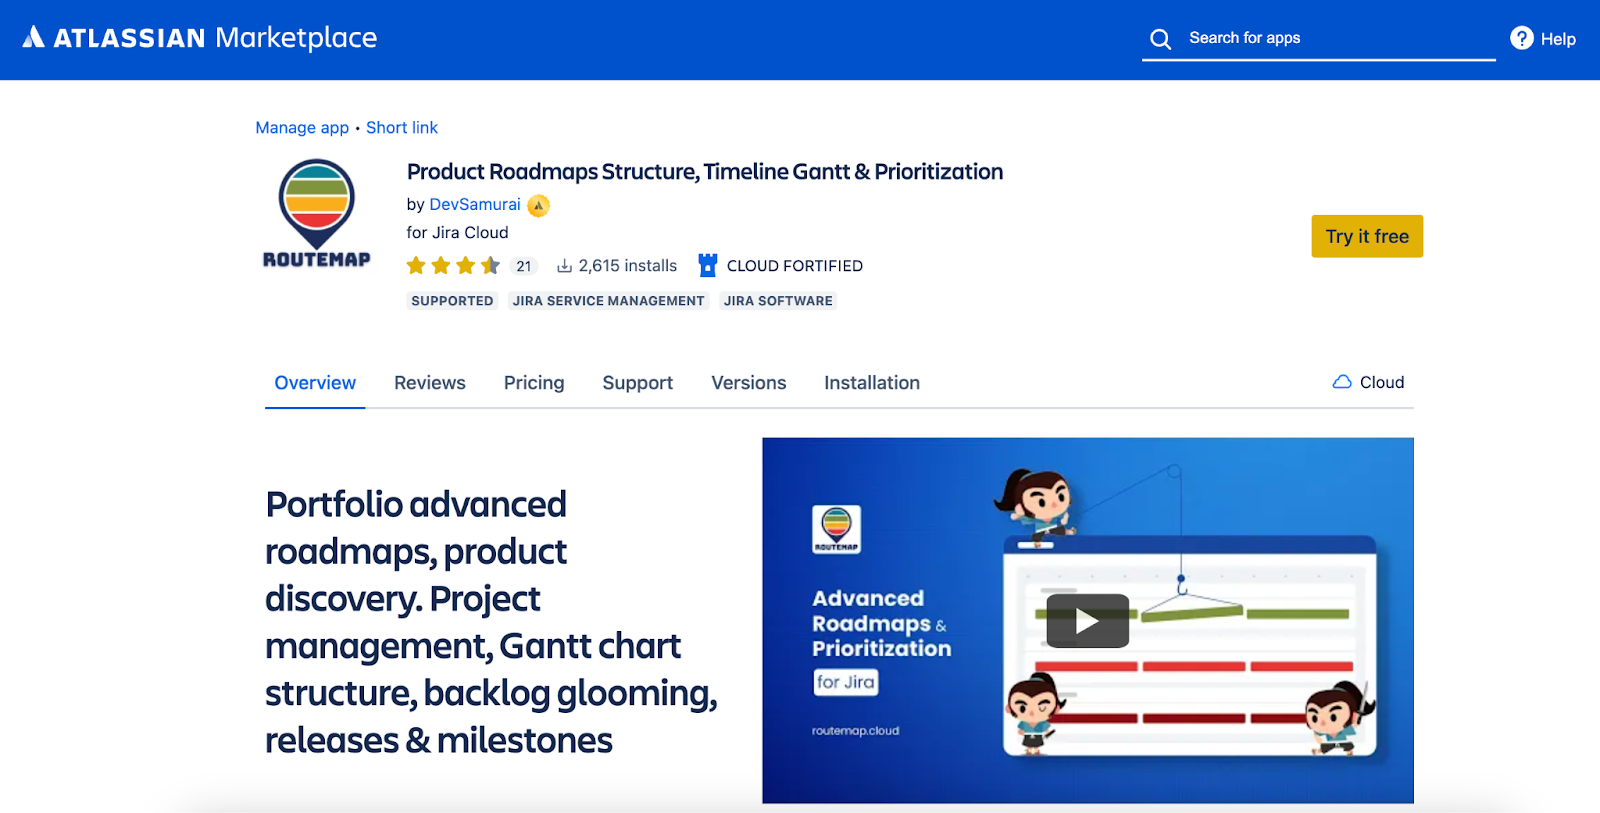
You can learn more about how to install Routemap to better understand this topic.
2. Start creating a new roadmap to access prioritization
Once you’ve finished installing this solution, the next step is to create a new roadmap for your project.
The reason is that the Routemap app also empowers you to manage your tasks, products, and projects. And of course, it accounts for prioritization as well.
The process of creating a roadmap using Routemap is pretty simple, and you can find the details of this process in this article.
3. Go to your Prioritization Table
After creating your new roadmap, you can access the table for prioritizing tasks or issues.
Just simply click on the Prioritization table tab. Then, you will see all of your issues from the selected project shown up in this table.
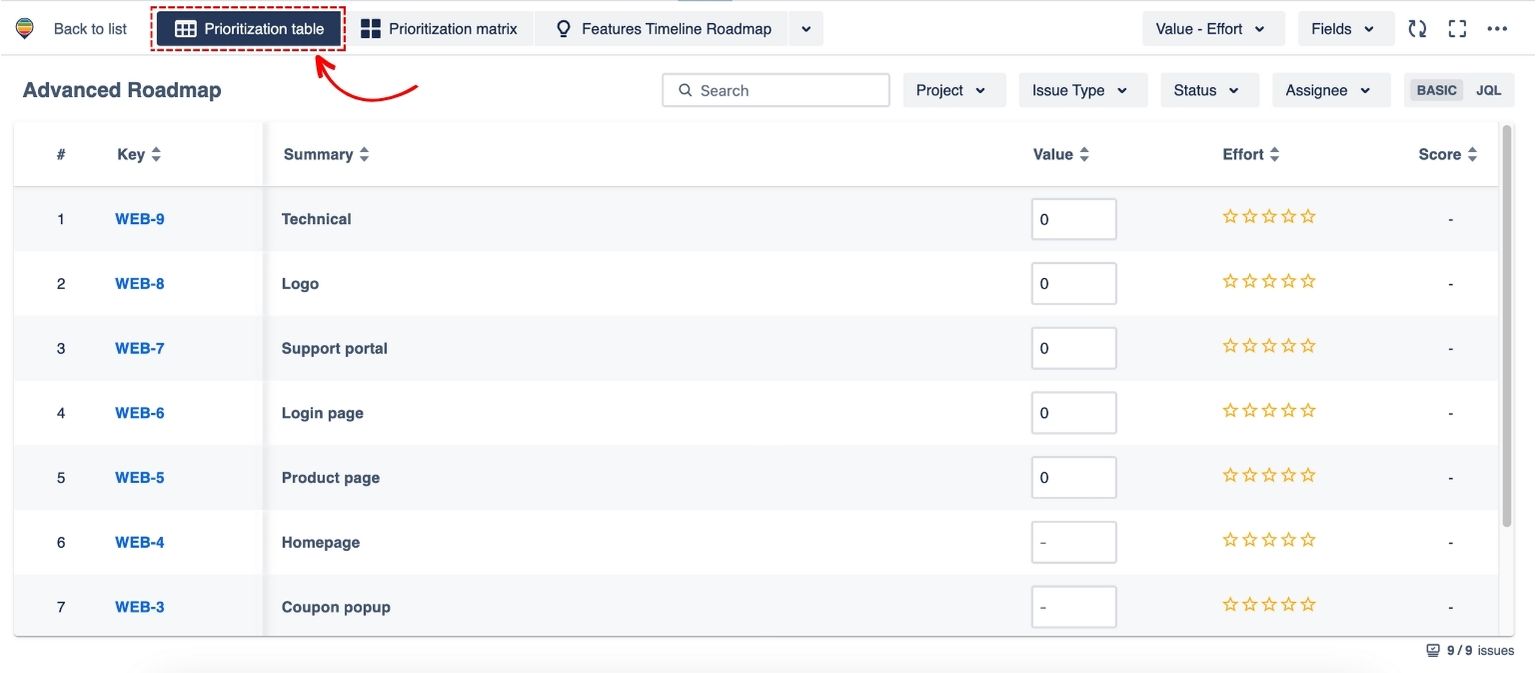
At this point, you and your team can communicate with each other and decide which tasks need to be prioritized. As you can see from the table, Routemap supports Value vs Effort and RICE prioritization methods.
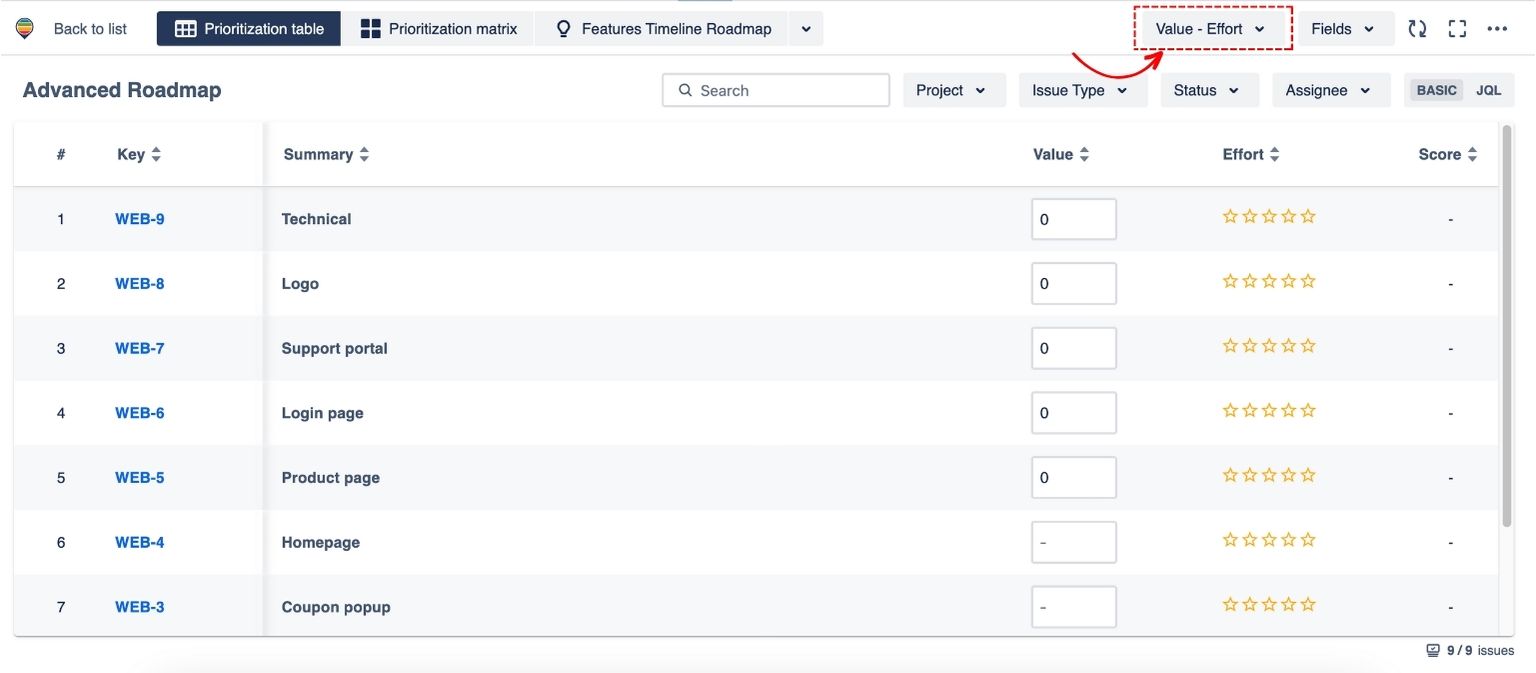

However, you can also make prioritization for Jira by creating your own method. By clicking on Field, you can decide which metrics to use for prioritization or not.
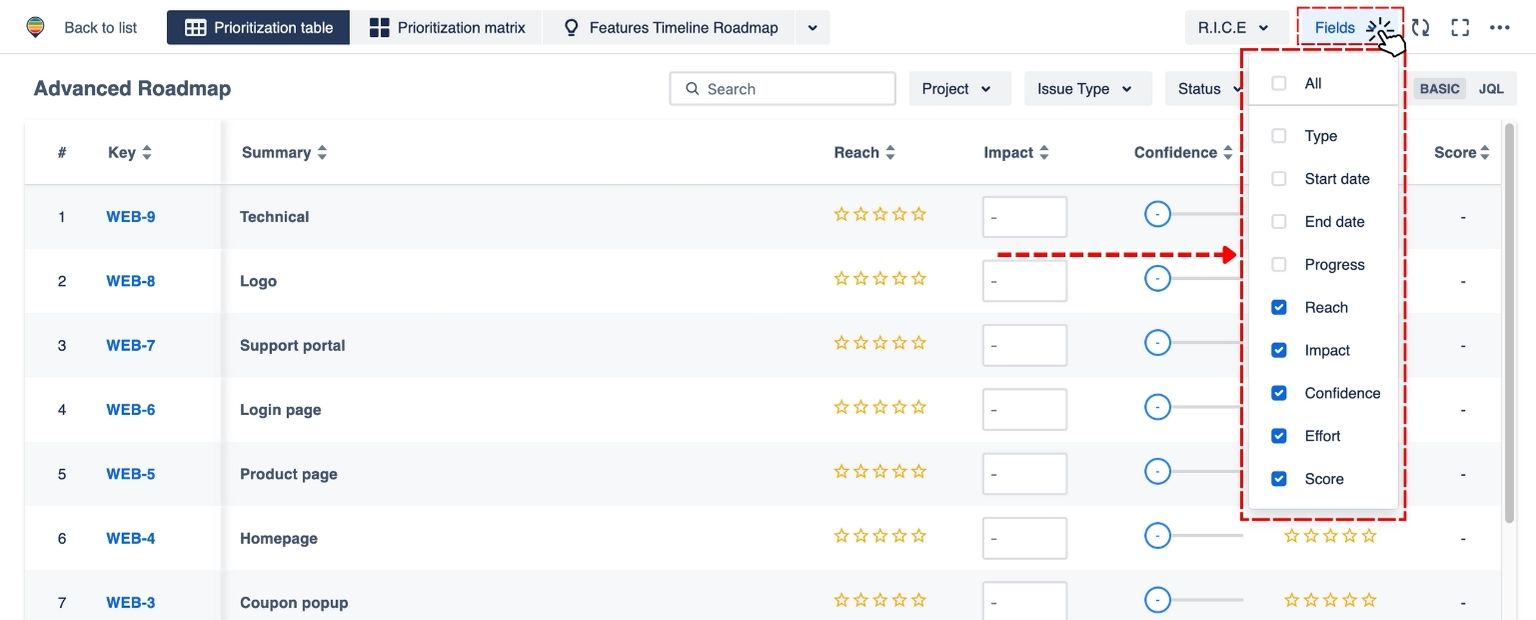
From the prioritization table, you can score Value, rate Effort, and decide on Confidence to get an evaluated Score for each of your tasks and issues. As a result, you can choose which one needs to be tackled first based on these scores.

4. Access your Prioritization Matrix
Next, you can move on and take a look at the Prioritization Matrix. This matrix feature will provide you with a bigger picture of your project, managing every task and issue in the same place.
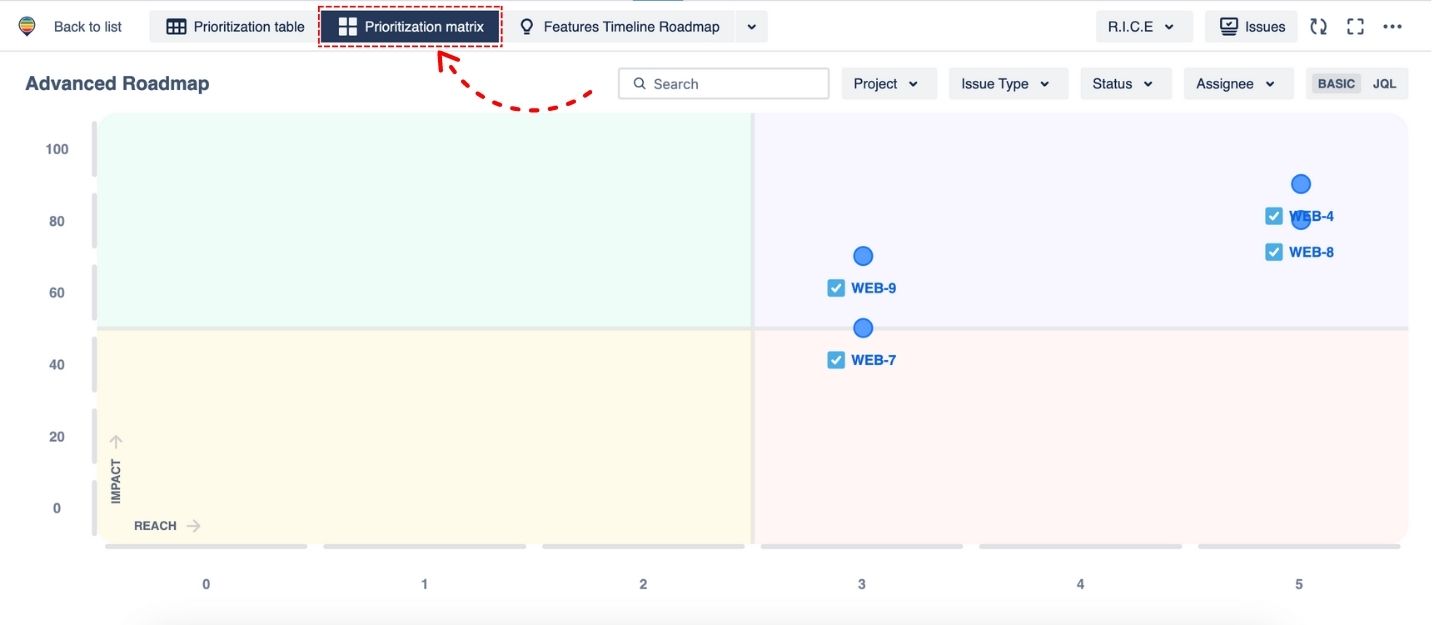
Additionally, the Prioritization Matrix will give you full power to manage and adjust your project at any time. If the table is where you and your team take the first steps to analyze your tasks and issues, the matrix will be the place where you make appropriate changes in the agile environment.

And that’s pretty much everything you need to start prioritizing for Jira using Routemap. If you have any questions, please send us a support ticket via Support Desk.