If you are looking for a tool to help visualize your roadmap and project on Jira, Routemap will allow you to do more than that. It can empower you to manage your project and product development with Jira’s advanced roadmap.
Feeling interested? Then let’s continue to this guide and learn how to create Jira advanced roadmaps of your own.
Step 1: Install the Routemap app
First, you need to install the app before creating any advanced roadmap for Jira. You can find this Product Roadmaps Structure, Timeline Gantt & Prioritization for Jira on the Atlassian marketplace.
For a more detailed installation guide, you can read the first guide of the series How to install Routemap.
Step 2: Set up your new roadmap
Once you’ve finished the installation, you can access Routemap via the Apps tab from your Jira software site. From there, you can begin creating your new roadmap.

In the Routemap dashboard, you can start by clicking on the New Roadmap button. There will be a popup asking you to fill in the required fields and information, including the Title (or name) of the roadmap, which projects this roadmap is made for, and the duration of this roadmap.
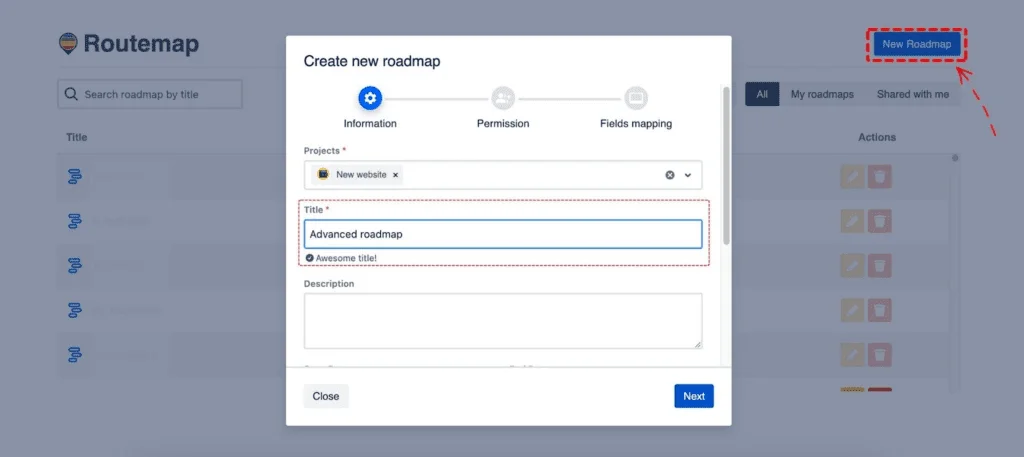
Additionally, you can also fill in the Description box to better describe the roadmap if you want to.
When scrolling down, you will see more setting options for your new roadmap. The first option is the Isolated mode check box. As you can see from the screenshot, this feature allows you to make this roadmap stand-alone without synchronizing to any other projects or roadmaps.
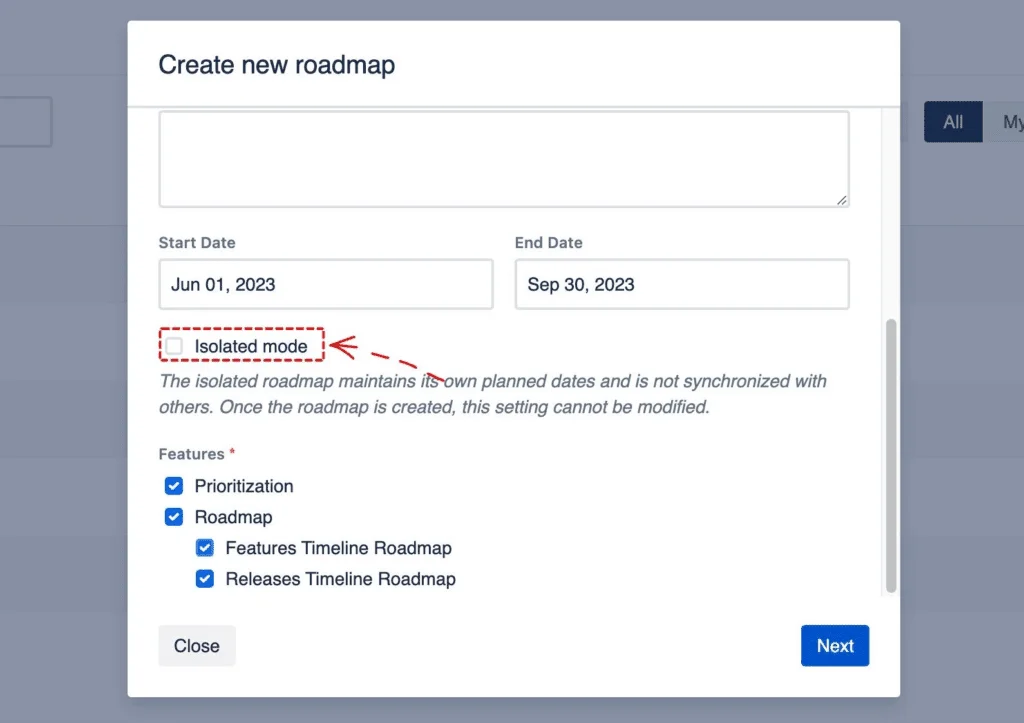
The idea behind this mode is to help you focus on one specific work in your project and get it done. Or, it could be that you want to make a roadmap for yourself and keep track of your own progress.
The next option is deciding which features will be included in your roadmap. Depending on your project and goals, you may want to remove some features to keep your roadmap simple. However, we recommend using all the provided features for the best experience with Routemap.
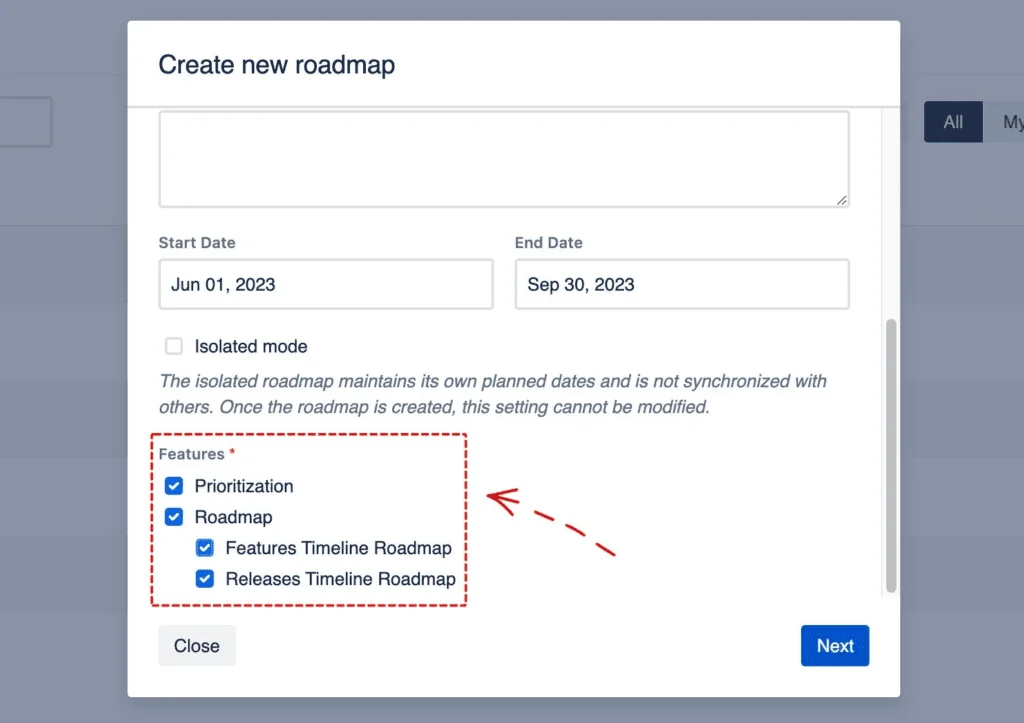
Besides, you will never know if your roadmap needs some features in the long run. So, it is a good idea to keep those boxes checked.
After that, you can click Next to move on to the Permissions settings. In this section, you can set the Admin role to your team member so they can have full control over the roadmap just like you.
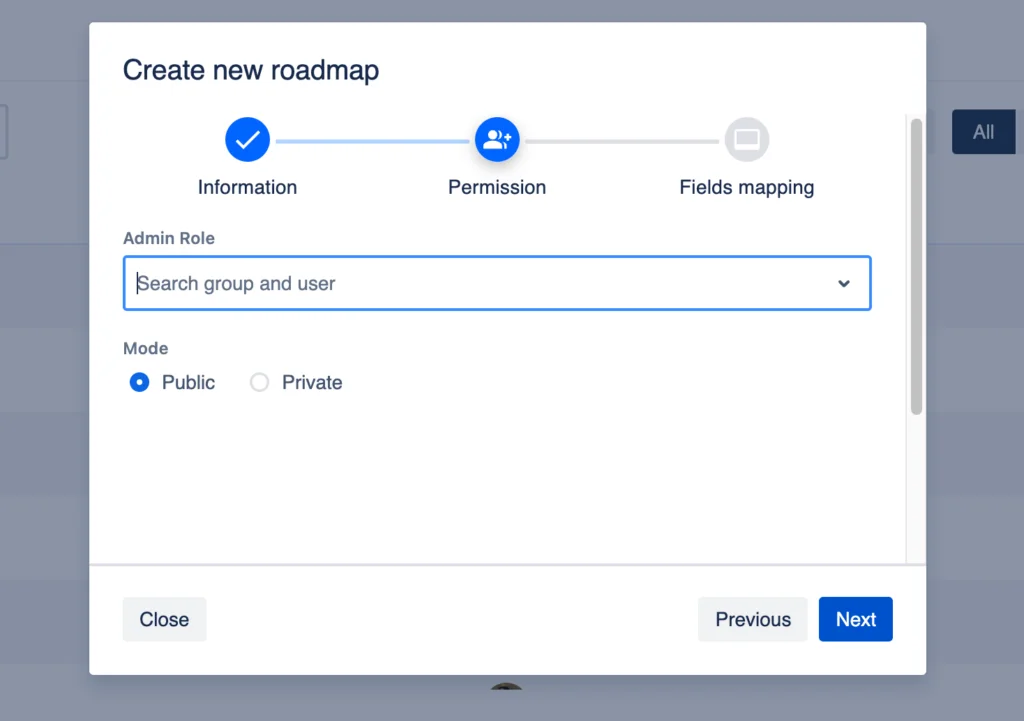
Next, you can set the roadmap to be public to everyone on your team, or you can make it private to only a few members.
The last section of this step is the field mapping. You will be able to set starting and ending dates, and you can also migrate this data from Routemap to your Jira for better management.

When everything is completed, you can click Create, and you will see a newly created roadmap in the dashboard.
Step 3: Create Jira advanced roadmaps
For the advanced roadmap feature, there are two major types of roadmaps. One is the Feature Timeline Roadmap, while the other is the Release Timeline Roadmap.
Feature Timeline Roadmap
Add a new lane
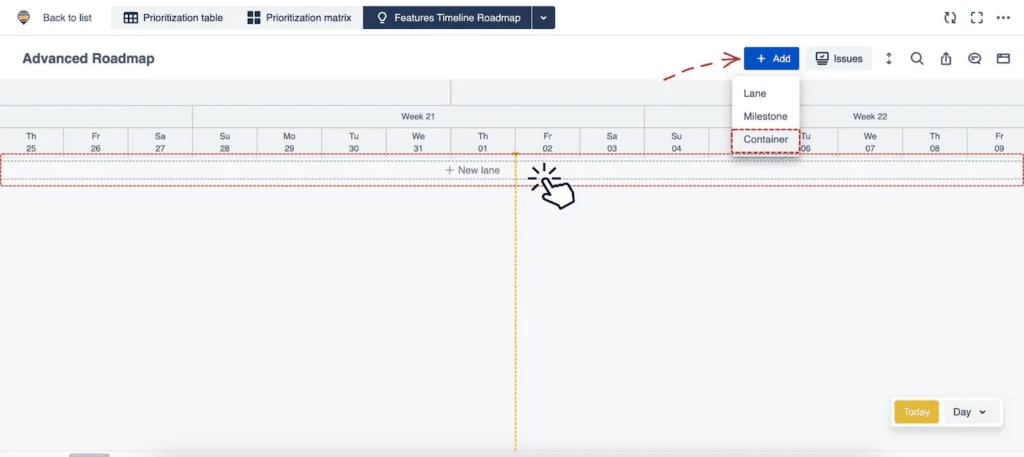
You can now build your Advanced roadmap for Jira by simply clicking on its name. To get started, click the +Add button and choose Lane or click +New lane on the screen.
You can make any adjustments to this Lane by clicking on the symbol. You can change its name, color, and lane description, or delete it.

Moreover, you can collapse or expand these lanes as you wish.
Add issues to the Jira advanced roadmaps
After adding lanes, you can begin adding issues or tasks from the project. If you have already planned all the tasks for you and your team, you can simply drag and drop them into your Jira advance roadmap.
First, you can access them via the Issues button, then you’ll see a column appearing on the right with all the tasks. As mentioned before, you can simply click on these issues and drag them to the board.

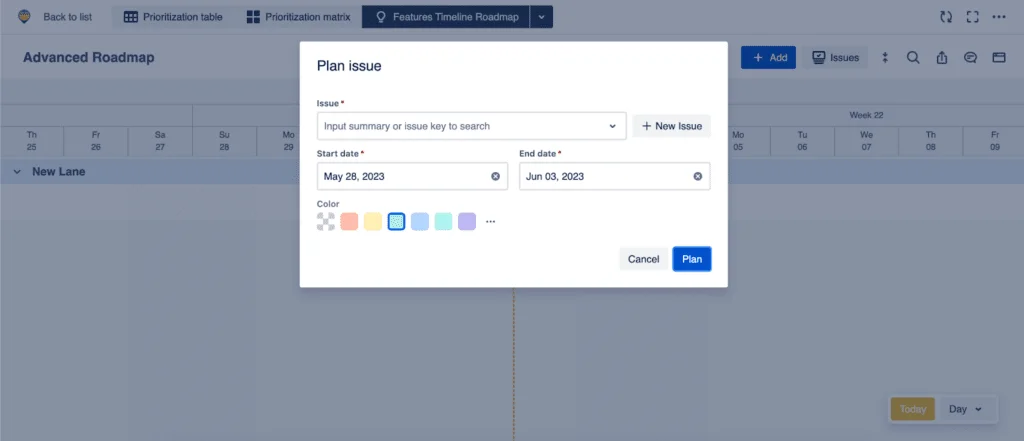
In case there is a new task, you can create an issue right within the Routemap app. To do this, click on the empty lane, and a Plan issue popup will appear. Next, you can click + New issue and start a new issue for your current project.
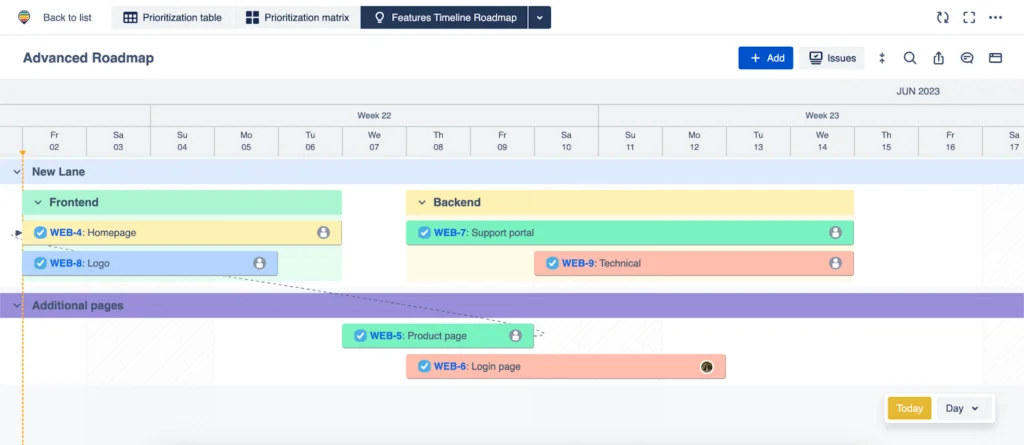
Add containers
A container in the roadmap helps you group the related issues or tasks for better management. To begin with, you can go back to the +Add button and choose Container.
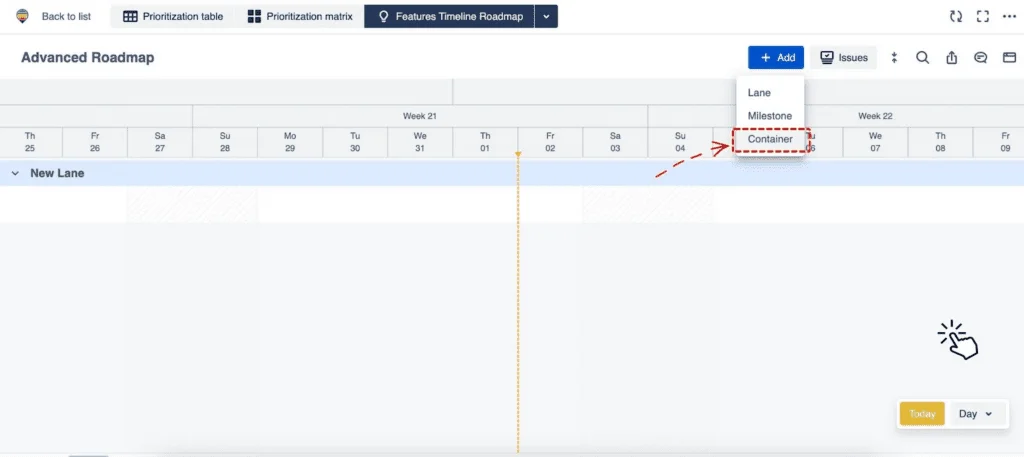
Then, you can decide to add this container to which lane in the roadmap and give it a name so anyone in your team can know what the issues in this container are for. After that, you can drag your issues, or create new ones into this container.
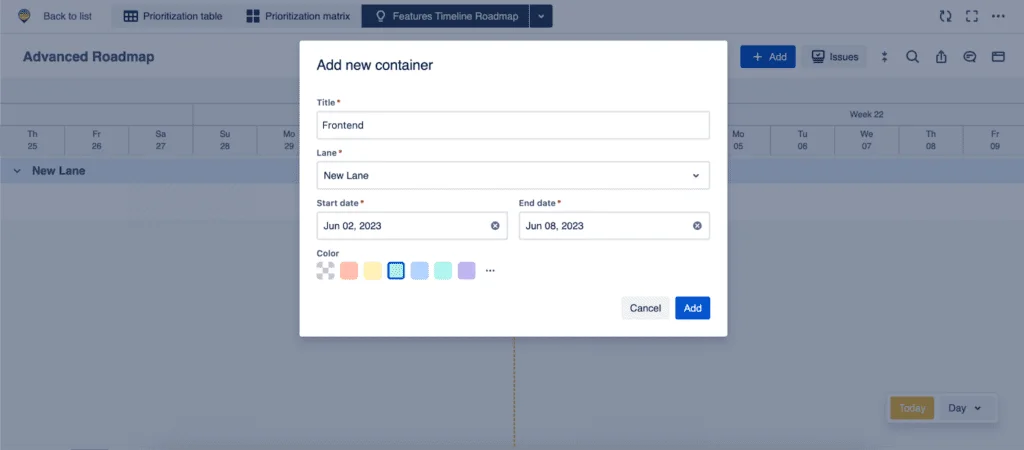
Additionally, you can set different starting and ending dates for this container to let everyone know the timeline to finish the tasks within. However, you can also drag and drop this container to a new timeline on the roadmap depending on the circumstances.
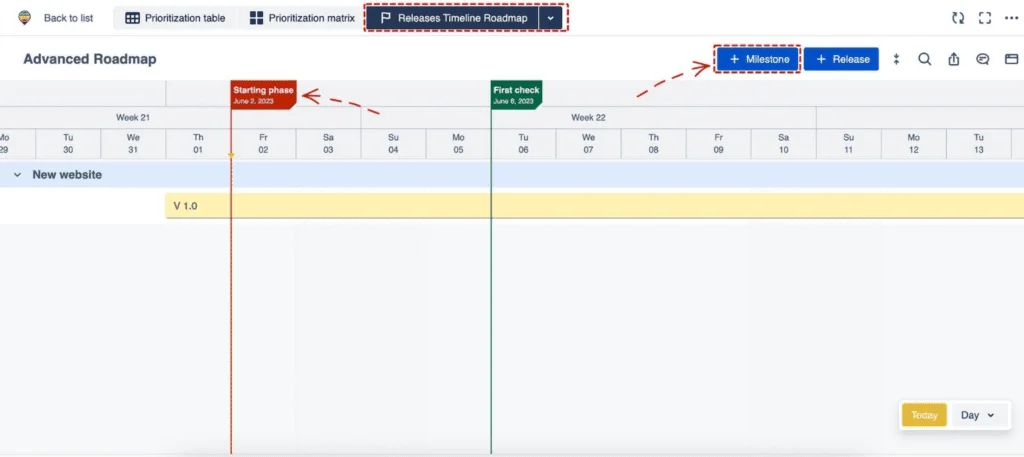
Release Timeline Roadmap
When you are happy with the feature roadmap, you should take a look at the Release Timeline Roadmap.
This feature allows you to create a roadmap and plan ahead for versions or stages of your project. In other words, you can develop a roadmap for your project’s life cycle.
Create new releases
As you can see, a lane for release will be automatically created based on your project. To add a new Release version, you can locate the + Release button or click in the empty lane.
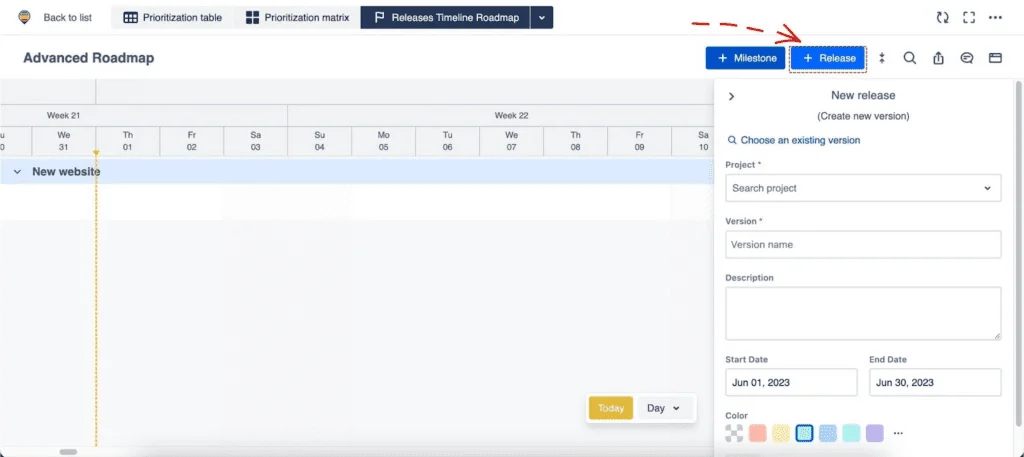
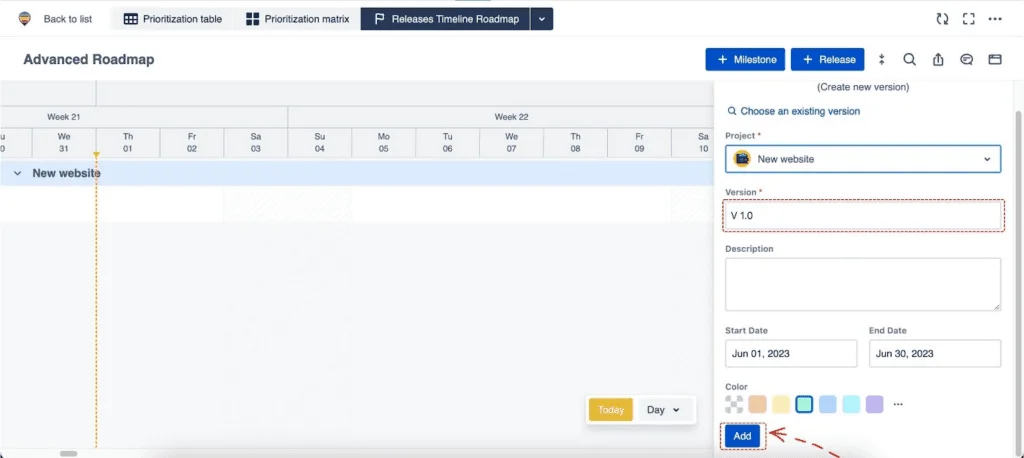
From the New release popup on the right, you can give it a name (usually the version number of your project) and an estimated date of the release. And don’t forget to choose a color for it.
Once having completed everything, you can go on and click Add the new release.
Remember that you can always configure this release by simply clicking on it. You can change its name, timeline, and more.
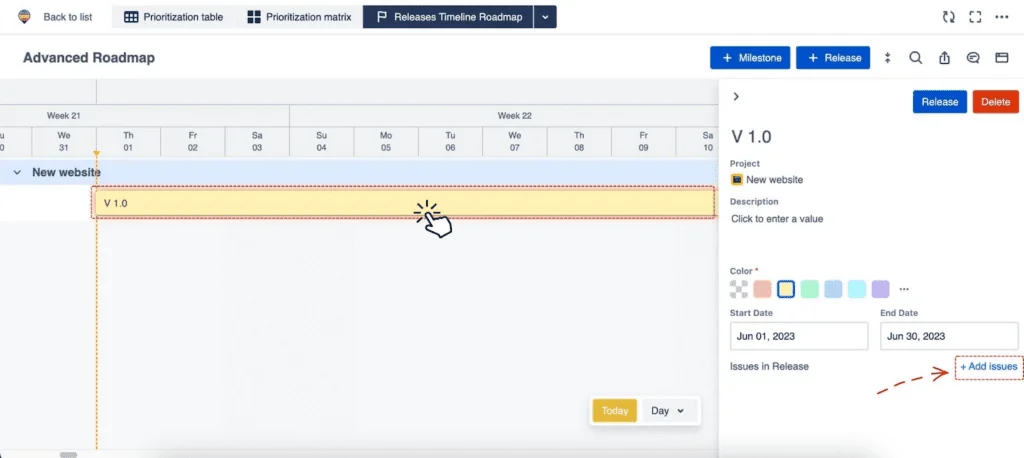
Add issues to the release
At this point, you can begin to add issues to this release roadmap. There will be a popup to ask you to create new issues, or you can choose the existing ones from your project.
If you choose to use existing issues, you will a new popup. At this step, you can choose each issue from the dropdown list that you want to add to this release.

Once done, you can click Save and now all of the selected issues belong to this release.
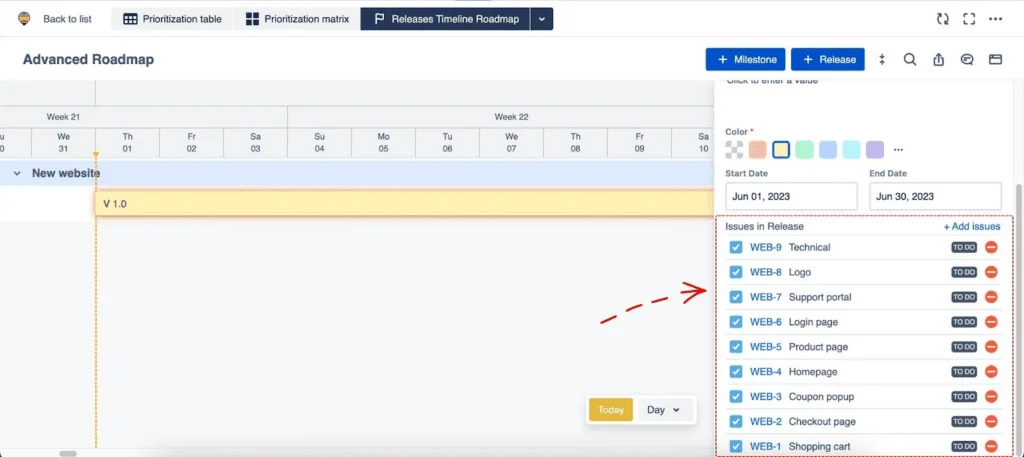
As you can see, this works like a portfolio roadmap, containing all the issues you need to finish your project. You can manage every work in progress in the same place.
Step 4: Start managing your work, release, and roadmap
After completing the configuration, all you have to do now is to manage this roadmap.
For the Issues timeline roadmap, you can use the drag-and-drop ability to adjust each task, change the timeline or switch swim lanes.
Additionally, you and your team members can adjust the progression of each task and manage how well everyone is working or if there are any unexpected obstacles.
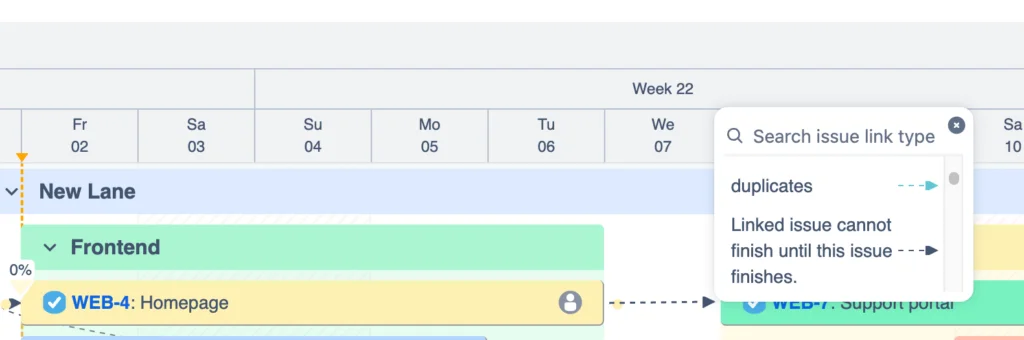
Besides, you can note dependencies for needed issues, letting everyone know which issue needs to be completed first.
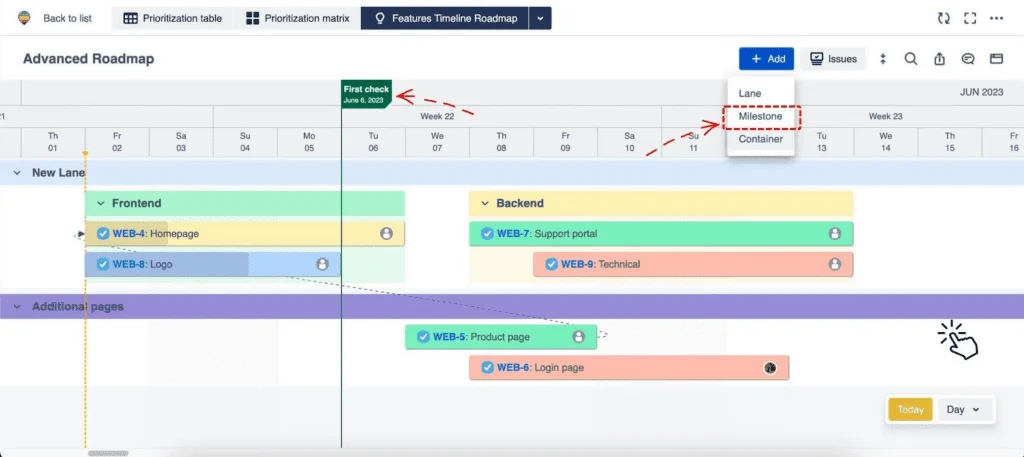
Last but not least, you should also mark the events in your roadmap by using the Milestones feature (for both Feature Timeline Roadmap and Release Timeline Roadmap). It can help you and your team avoid missing any important dates throughout the development progress.
So this is how you can create Jira advanced roadmaps using Routemap. You can visualize and manage your work more effectively than by using traditional methods like spreadsheets or Gannt charts. If you have any questions or need support when using Routemap, please feel free to send us a ticket via our Support Desk.