Routemap is a powerful Atlassian application to help users visualize their product roadmaps in the most understandable way possible. Additionally, the app also offers great features such as prioritization and product discovery to provide its users with the best ability to enhance their productivity.
Therefore, this is undeniably one of the most recommended roadmapping solutions for anyone using Jira. And here is how you can install Routemap.
Table of Content
Step 1: Log into your Jira instance
First thing first, you need to log into your Jira instances. There are several methods you can try, like signing in to your email account or using Google, Apple, Microsoft, or Slack accounts.
Step 2: Search for Routemap
Once you’re logged in, you can search for the Routemap app in the Atlassian marketplace. You can use the term “product roadmap,” “prioritization,” or just simply “Routemap.”
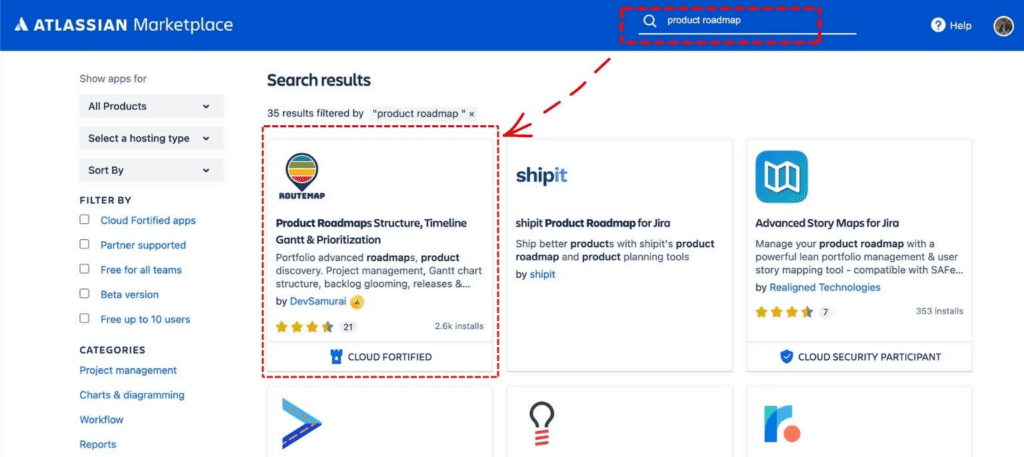
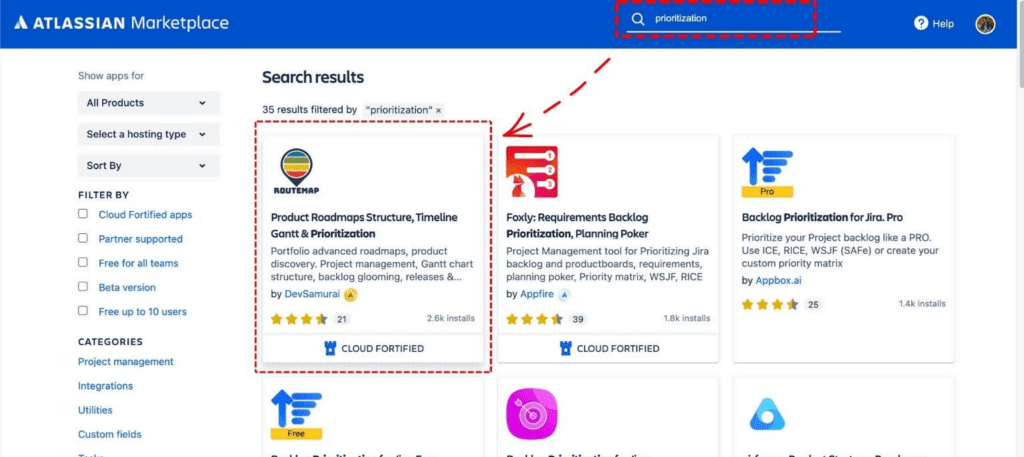
OR, you can also follow the link below to go directly to the app’s marketplace page.
https://marketplace.atlassian.com/apps/1228080
Step 3: Install Routemap
After you have located Routemap, you can now try the app for free.
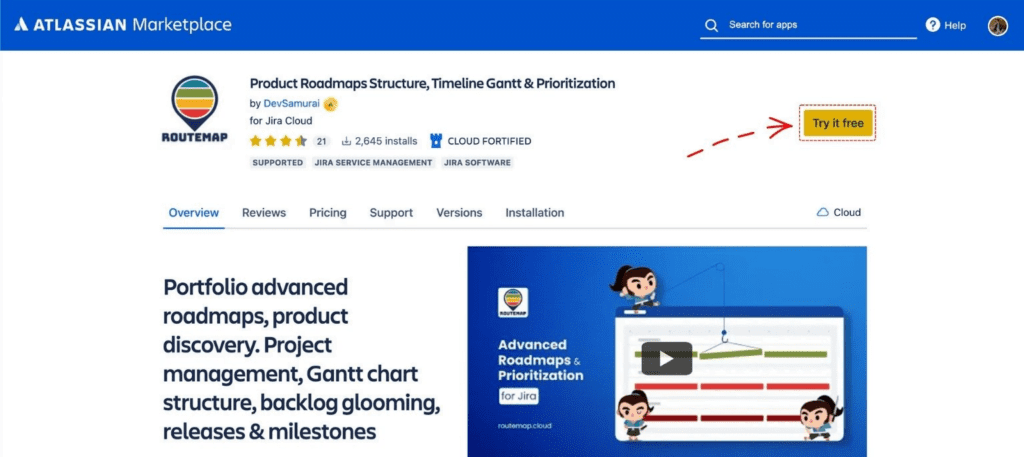
There will be a yellow button saying “Try it free.” Click it and a small window will pop up to let you know which site of yours you want to install Routemap to.
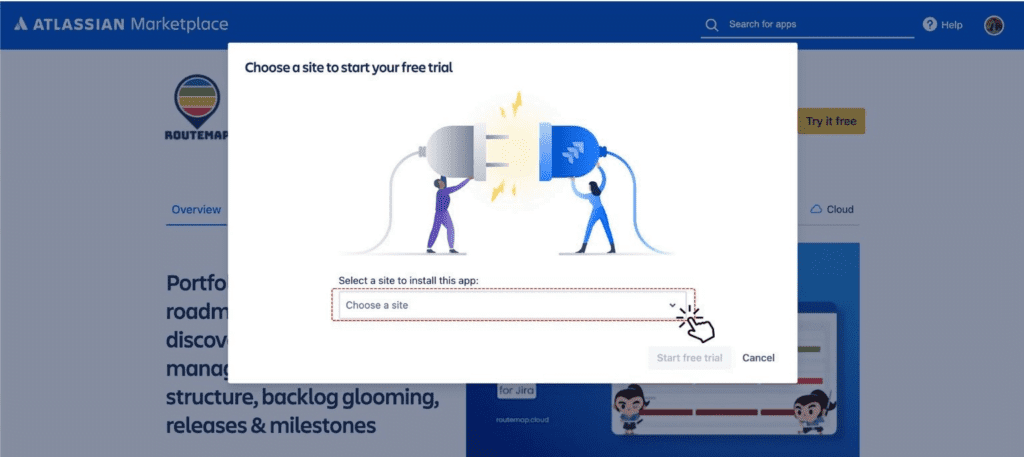
Once the installation is complete, you will see a notification popup to let you know about it.
And that’s everything! Now you can go back to your Jira dashboard, locate the Apps tab, and the dropdown menu will show the Routemap app you have just installed.
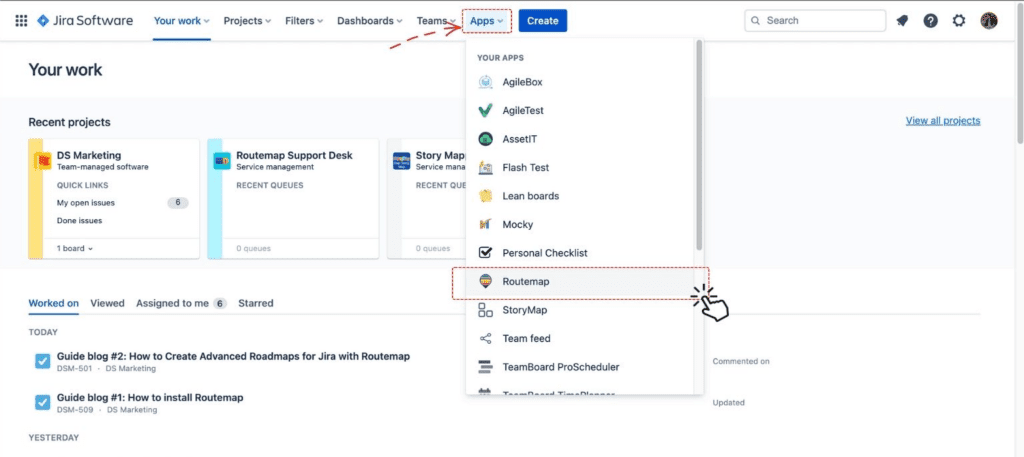
If you have any issues during the installation process, please feel free to contact us via the Routemap’s Support Desk.

