Kanban is a widely adopted methodology for visualizing and managing workflows, promoting transparency, and improving efficiency. And learning how to create a Kanban board in Jira, a powerful project management tool, makes it easy to implement and customize Kanban boards to suit your team’s needs.
In this article, we will show the process of creating a Jira Kanban board to streamline your tasks and enhance productivity. Not only that, we will also help you discover how to improve your project management by utilizing other Kanban variations.
Let’s dive in!
Kanban, what does it mean?
Kanban is a visual management methodology that originated from lean manufacturing to improve production efficiency. The term “Kanban” comes from the Japanese words “kan” (visual) and “ban” (card or board). Essentially, Kanban means “visual signal” or “signboard.”
Kanban originated from Toyota’s manufacturing practices in the late 1940s, developed by industrial engineer Taiichi Ohno. During that time, Kanban aimed to improve production efficiency and minimize waste when Japan faced significant economic challenges post-World War II.
Kanban principles have been adapted beyond manufacturing to various industries, including software development and project management, due to their effectiveness in visualizing work, limiting WIP, and promoting continuous improvement.
How to create a Kanban board in Jira
Now, let’s take a close look at how you can create Kanban in your Jira instance. The very first thing is that you have to log into your Jira account.
1. Create a new project
In your Jira instance, go to the Projects tab on the header and choose “Create project” from the dropdown menu. Next, you will see there are multiple options for you to choose for your project.
Since we are creating a Kanban project, you can choose Kanban from the templates list.
2. Choose the right Kanban for you and your project
In this step, Atlassian provides a small overview of your upcoming project board using the Kanban method. This will allow you to decide if the current template is suitable for your team or not.
If this template is the right approach for your project, you can click Use template to move on to the next step.
3. Choose your project type
In Atlassian, there are two types of projects that you can choose from: one is Company-managed projects, and the other is Team-managed ones. You can choose either one of those depending on the project size or which teams are involved in this project.
However, you should remember that only the Jira admin can create a Company-managed project. Therefore, you should double-check your permission just in case.
4. Fill in project details
Next, you will have to add details to this Kanban project on Jira. Things like the project name, member access, and the project key.
Normally, the system will automatically generate a project key with uppercase letters based on its name. However, you can always change this key to your preference and make it easy to recognize.
5. Done, and it’s time for your team to work on the Kanban board
You can now hit Save and your Jira Kanban board is ready at your service. Moreover, you and your team can customize this board even further from its original template.
For example, you can add, remove, or rename columns to reflect different stages of your workflow. Besides, you can also create swimlanes to group issues by queries, assignees, epics, or other criteria.
Create Kanban in Jira with Routemap
That is how to create a Kanban board in Jira, straightforward. However, if you want to take it to another level, why not try other Atlassian tools like Routemap to utilize your Jira Kanban board further?
1. Use Routemap’s Kanban to manage your releases
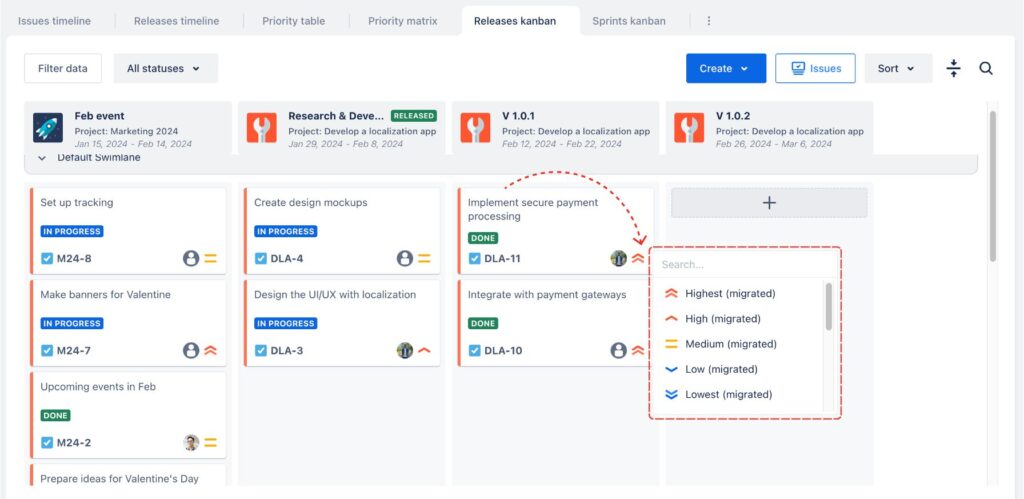
Routemap has a Releases kanban feature, allowing you to use a Kanban board to visualize and manage your project releases effortlessly. Being integrated into Atlassian tools means you can seamlessly add your Jira issues or tickets to this board.

Additionally, you can manage multiple releases from different projects across your entire organization. This allows you to have a complete overview of your projects and product development.
In this feature, you can also add new columns as new release versions of your projects and create more swimlanes to define everyone’s workflow on the same board. As a result, teams can keep updated on each member’s progress.
2. Visualize your Jira sprint backlog on Kanban
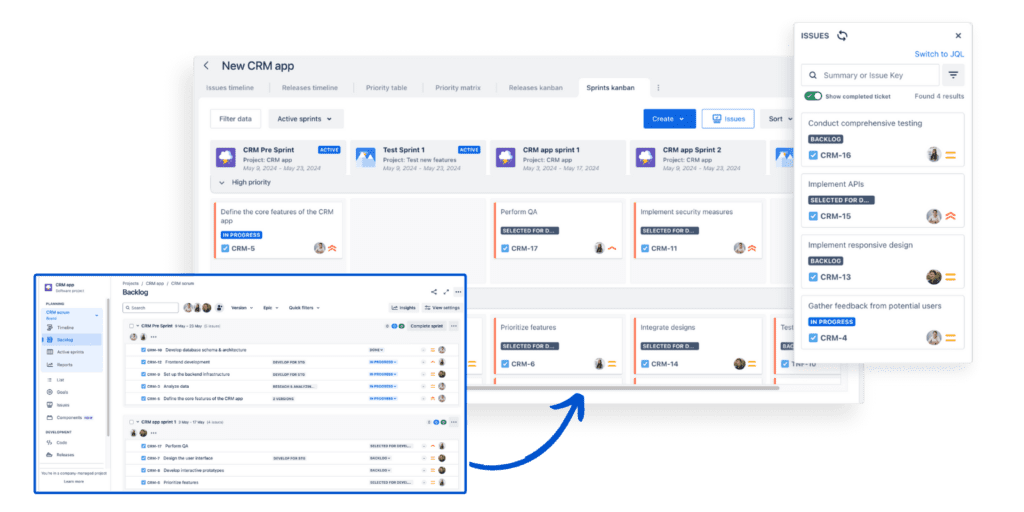
Another great use case for product teams is that they can use Routemap’s Sprints kanban feature to visualize their Jira sprint backlog for effective management. Quite similar to the Releases kanban feature, it allows teams to integrate their project sprints on this board and create a unified workspace for every member.

The best part is that the team can have all of their sprint backlogs from multiple projects visualized in the same place. This empowers teams to work more efficiently and quickly make any adjustments when needed.
Conclusion
Creating a Kanban board in Jira is a simple yet powerful way to improve your team’s workflow and productivity. Whether you are new to Kanban or looking to enhance your current process, Jira’s comprehensive features make it an ideal tool for implementing Kanban principles and optimizing your workflow.
By following the steps outlined in this guide, you can set up a board that provides clear visibility into your project’s progress. As a result, you and your team can manage tasks effectively and identify bottlenecks early.
Related articles:


